Portable Generator Interlocks: Sizing & Safe Connection Guide
We walk through how to choose the right size portable generator, what an interlock does, and how we safely connect backup power to your home.
We recently got a call from a homeowner — we’ll call her Linda — who wanted to add a portable generator connection and an interlock to her home. She hadn’t bought a generator yet and was torn between an 11,500-watt and a 13,000-watt model. Her big questions were:
- “Is that too much for my house?”
- “Could I go smaller and still be comfortable?”
- “How do I safely connect it to my panel?”
We hear some version of Linda’s questions almost every week, especially after storms roll through. As an electrical contractor, we install a lot of portable generator inlets with panel interlocks, so we’ll walk you through how we think about size, safety, and connection when we come out to a home.
What an Interlock Kit Actually Does
When we arrive at a home for an interlock install, the first thing we do is stand with the homeowner at the main panel and explain how the setup will work. An interlock kit is a mechanical device mounted on your breaker panel that:
- Prevents your main breaker and your generator breaker from being ON at the same time.
- Ensures that when the generator is feeding your panel, the utility feed is physically forced OFF.
- Lets you use your existing circuits (within limits) instead of a small transfer switch subpanel.
This is what keeps you from backfeeding the grid, which is dangerous for utility workers and can destroy your generator. With Linda, we asked her to text us a picture of her panel so we could confirm what style of interlock would fit and whether she had room for a new generator breaker.
Step 1: Decide What You Really Want to Power
Before we talk generator sizes, we walk homeowners through a quick wish list. When we’re standing in a kitchen or walking through a basement, we usually ask:
- Do you want to run the furnace or boiler (or air handler)?
- Do you need a well pump or sump pump?
- Which refrigerator/freezer units?
- A few lighting circuits and outlets in key rooms?
- Are you trying to run central AC or just small window units?
We explain that an interlock doesn’t magically give them “whole house” power — it gives them flexible control. They can turn breakers on and off to stay within the generator’s capacity.
Choosing the Right Size: 30A vs 50A Generator Setups
In Linda’s case, she was looking at 11,500–13,000 watts. That’s typically in the range of a 50A generator inlet. But not everyone needs that much. Here’s how we usually break it down when we’re at a service panel with a homeowner:
Common 30A (about 7,500W running) Setup
A 30-amp, 240-volt connection gives you roughly 7,200–7,500 running watts. With a 30A inlet and interlock, we typically recommend a load plan like:
- Gas furnace or boiler (blower only, not electric heat)
- Refrigerator and possibly a freezer
- Sump pump or well pump (one motor load at a time)
- Wi‑Fi, TV, and a few key lighting circuits
- Microwave or small kitchen outlets (not all at once)
This gives a very livable home during an outage without oversizing the generator. For many homes, this is the sweet spot.
Common 50A (10,000–13,000W running) Setup
With a 50-amp, 240-volt connection (like what Linda was considering), you’re usually in the 10,000–13,000-watt range. Our typical 50A emergency load plan might include:
- Furnace or air handler
- Refrigerator + freezer
- Well pump or sump pump
- Kitchen small appliance circuit
- A few bedroom and living room lighting/outlet circuits
- Possibly a small central AC or a couple of window units (depending on startup currents)
We walk through the label on each big-load breaker (AC, range, dryer, water heater) and explain which ones to keep OFF when on generator. Full electric ranges, electric water heaters, and EV chargers are usually impractical on a portable generator.
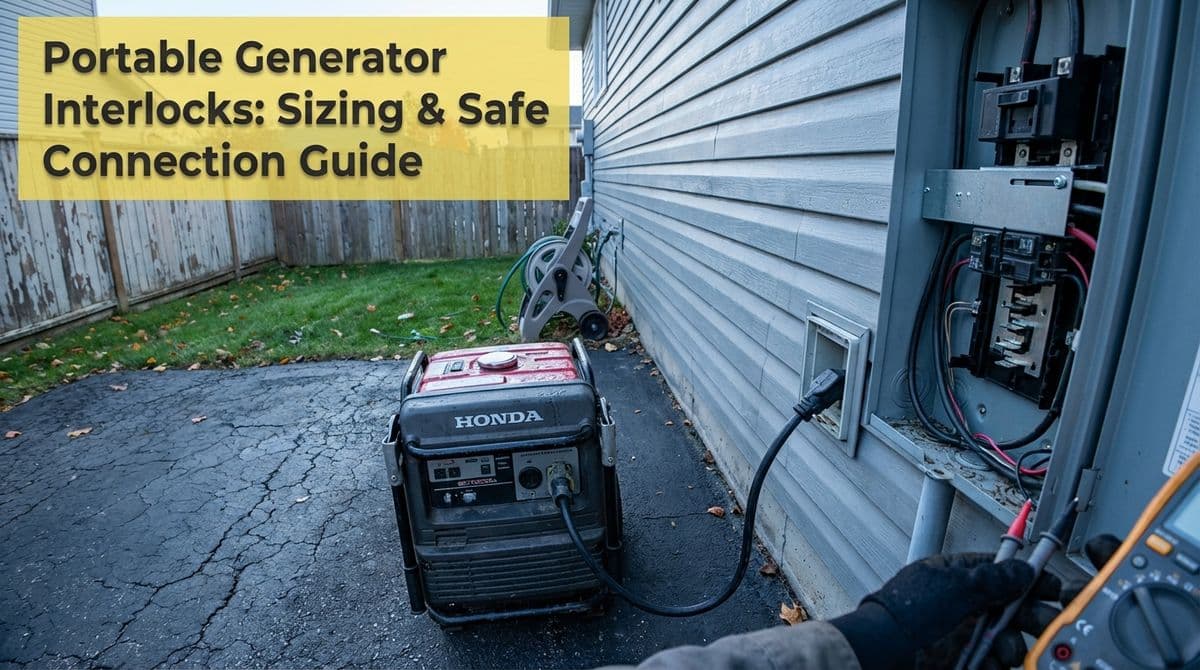
How We Safely Connect a Portable Generator to Your Home
Once we’ve settled on a generator size and inlet rating, our on-site process is pretty straightforward and code-focused. A typical visit looks like this:
- Inspect the existing service panel. We verify panel brand, available breaker spaces, grounding, bonding, and service size.
- Mount the generator inlet. Usually outside near the meter or panel, in a weatherproof box, sized for 30A or 50A.
- Run generator cable. We pull the correct gauge copper cable from the inlet to your main panel, stapled and protected to meet code.
- Install the generator breaker and interlock. We add a 2‑pole breaker for the generator and mount the interlock plate so it physically blocks the main and generator breakers from being on together.
- Label everything clearly. We apply permanent labels and walk you through the operating steps.
Local codes usually require a permit and inspection for this work, and we handle that paperwork when we schedule the job. Inspectors want to see proper wiring size, listed interlock kits that match the panel model, and a correctly installed inlet with a clearly marked emergency power source.
Basic Operation: How You Use the Interlock in an Outage
When we finish an install, we always stand at the panel and have the homeowner run through a “dry run” with us. The sequence we teach is:
- Turn OFF large non‑essential breakers (range, AC, water heater, EV charger).
- Turn the main breaker OFF.
- Slide the interlock plate to uncover the generator breaker.
- Start the generator outside, let it warm up, then plug in the generator cord to the inlet.
- Turn the generator breaker ON.
- Turn on only the circuits you need, one at a time.
- When power is restored, reverse the process: turn off loads, turn off generator breaker, slide the interlock back, turn main breaker ON, then shut down and disconnect the generator.
We also stress generator safety basics: keep the unit outside, away from windows and doors, never inside a garage, and use a heavy-duty, proper gauge cord.
Maintenance & Testing: Don’t Wait for the Storm
The last thing we tell homeowners like Linda is: don’t wait for a blizzard or thunderstorm to find out if your setup works. We recommend a simple routine:
- Monthly or quarterly start-up: Run the generator for 10–15 minutes with a light load to keep it healthy.
- Annual “practice outage”: Once a year, go through the full interlock procedure so your family knows the steps.
- Fuel management: Rotate gasoline with stabilizer, or consider a dual-fuel (propane/gas) model.
- Visual check of panel and inlet: Look for rust, damage, or loose covers; call us if anything seems off.
When we build interlock systems, our goal is that in the middle of a storm, you’re not guessing — you’re just following a familiar routine.
So, Was 13,000 Watts Too Much for Linda?
After looking at the photos of her panel, walking through her must-have loads, and confirming she had the panel space for a 50A inlet, we told her that an 11,500–13,000-watt generator with a 50A interlock setup would work well if she was comfortable maintaining a larger unit and understood she still couldn’t run everything at once.
For another homeowner with fewer needs, we might recommend a 30A, 7,500-watt class generator instead. The right answer always comes down to your panel, your loads, and your expectations.
If you’re like Linda and you’re “in the beginning phases” and just want to know what size makes sense and what an interlock will cost, sending us clear photos of your panel is a great place to start. From there, we can size the generator connection properly and make sure your backup power is safe, legal, and ready when you need it.